
Imagine making your own custom boat, just how you want it. Ready to hit the open waters. This dream can come true with the stitch and glue method, all from home.
Ever wondered, “What exactly is a stitch and glue boat, and why is it a popular choice for amateur boatbuilders?” This guide will show you how it works. We’ll give you the tools and materials you need. And guide you step-by-step to build your own boat at home. Get ready for a fun DIY journey and show off your boat-crafting skills!
Key Takeaways – How To Build a Stitch and Glue Boat
- Stitch and glue boatbuilding is a accessible and popular technique for amateur builders
- This method allows you to construct a custom, sturdy boat using plywood panels, epoxy resin, and fiberglass tape
- The step-by-step guide will equip you with the knowledge and skills to build your own unique stitch and glue boat
- Stitch and glue boats can be used for a variety of on-the-water activities, from fishing to recreational boating
- By the end of this guide, you’ll have the confidence to tackle your very own stitch and glue boat project at home
Introduction to Stitch and Glue Boat Building
Stitch and glue boat construction is a favorite among DIY boat lovers. It uses plywood panels, fiberglass tape, and epoxy resin to build boats. This method creates a strong, single-piece hull that’s easier to care for than traditional boats.
What is a Stitch and Glue Boat?
A stitch and glue boat is made from plywood panels stitched and glued together with epoxy. This method lets the plywood naturally shape itself, unlike traditional molds. The stitches and fiberglass tape add strength, making the hull durable and watertight.
Benefits of Stitch and Glue Construction
- It’s simpler and faster than traditional boat building.
- You need less specialized tools, making it easier for beginners.
- It creates a stronger, single-piece hull that’s easier to maintain.
- You can build a stitch and glue boat in your garage or workshop.
- It combines the benefits of plywood boat construction with the stitch and glue method.
The stitch and glue method is popular among DIY fans wanting to build their own boat projects. It’s easy, versatile, and affordable, making it perfect for newcomers to stitch and glue boat building.
Stitch and Glue Building Method Overview
The stitch and glue boat building process is a favorite for building your own boat at home. It uses plywood panels to create a strong, watertight boat. Let’s dive into the overview of construction steps for the plywood boat assembly.
- Cutting and assembling the plywood panels for the boat’s sides and bottom.
- Joining the panels together using butt blocks and epoxy resin.
- Stitching the panels in place with wire or cable ties to hold the structure in shape.
- Applying fiberglass tape and epoxy resin to the seams for added strength and waterproofing.
- Installing internal frames and completing the interior construction.
- Fairing, sanding, and finishing the boat’s exterior for a smooth, polished look.
This step-by-step guide to the stitch and glue boat building process helps you understand the main stages. We’ll go into each step in more detail. This will help you have a successful and rewarding DIY boatbuilding experience.
“The stitch and glue method is perfect for the home builder, as it allows you to create a sturdy, seaworthy boat using readily available materials and basic tools.”
Tools and Materials Needed
Building a stitch and glue boat is a rewarding project. It needs a modest set of tools and materials. With the right equipment and supplies, you’ll be ready to start the project.
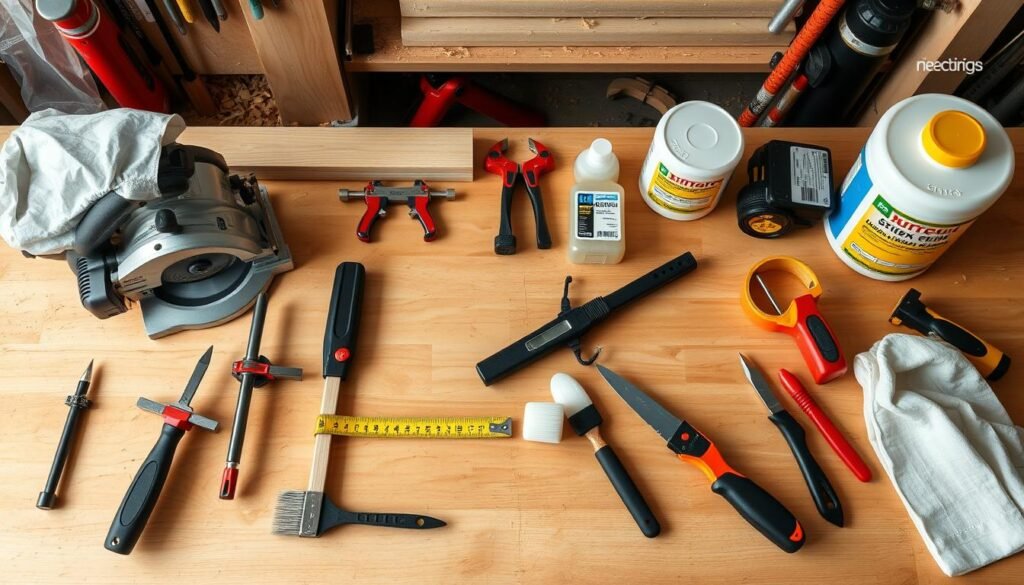
Essential Tools for Stitch and Glue Boatbuilding
- Circular saw
- Jigsaw
- Drill
- Epoxy brushes
- Scissors
- Clamping devices
Materials Required for Stitch and Glue Construction
- Marine-grade plywood for the plywood boat building supplies
- Epoxy resin
- Fiberglass tape
- Cable ties or copper wire
- Wood for any additional structural elements
By gathering these tools for stitch and glue boat building and materials for stitch and glue construction, you’ll have everything you need. You’ll be ready to start your stitch and glue boat building journey.
“The key to a successful stitch and glue boat project is having the right tools and materials on hand from the start.”
Cutting and Assembling the Plywood Panels
The first step in building a stitch and glue boat is to cut the plywood panels. These panels will form the boat’s sides and bottom. You need to accurately transfer the dimensions from the plans to the plywood sheets. This ensures a perfect fit and a smooth hull.
Drawing and Cutting the Side Panels
To make the side panels, mark vertical lines every 24 inches on the plywood sheets. These lines help plot the curved and straight lines of the boat’s design. Use a pencil to transfer the measurements carefully, keeping the angles and curves right.
After marking the panel shapes, use a circular saw to cut the plywood. It gives cleaner, straighter edges than a jigsaw.
Drawing and Cutting the Bottom Panel
The bottom panel is laid out differently. Start by marking a centerline on the plywood sheet. Then, measure the distances to create the desired shape. This method, called lofting boat plans, ensures the bottom panel fits perfectly.
As with the side panels, a circular saw is best for cutting the plywood. It gives the best results.
After cutting the plywood panels, it’s time to assemble them. Use butt blocks and epoxy to create the long, continuous pieces needed for the hull. This transferring boat design to plywood and plywood layout process is key to building a successful stitch and glue boat.
Making Long Panels with Butt Blocks
In stitch and glue boat building, making big panels for the sides and bottom is key. To do this, plywood pieces are joined together using butt block construction.
Butt blocks are small plywood pieces glued to seams between panels. This extends their length. First, the plywood is primed with epoxy resin. Then, panels are aligned and thickened epoxy is applied to the butt block areas.
Where the butt blocks are placed is very important. They are set so seams don’t line up, keeping the panels strong. It’s crucial to clamp and let the epoxy dry well to make a strong bond.
After the epoxy dries, the big panels are ready to build the boat’s hull. This epoxy gluing plywood panels method is a key part of stitch and glue building.
| Step | Description |
|---|---|
| 1. Prime the plywood | Coat the edges of the plywood panels with epoxy resin to prepare for the butt block attachment. |
| 2. Align the panels | Carefully position the plywood panels, ensuring the seams are staggered and do not line up. |
| 3. Apply thickened epoxy | Use epoxy resin thickened with colloidal silica to glue the butt blocks in place. |
| 4. Clamp and cure | Secure the panels with clamps and allow the epoxy to fully cure, ensuring a strong butt block construction. |
Learning butt block construction helps boat builders make the big, smooth panels needed for a successful stitch and glue boat.
Gluing the Panels Together
Now that the long plywood panels are assembled, it’s time to glue them together. We use marine-grade epoxy resin for this. It creates a strong, waterproof bond that’s key for your boat’s durability and performance.
Preparing the Epoxy Resin
Mixing and applying the epoxy resin is a critical step. You need to mix the resin and hardener as the manufacturer says. This ensures a strong bond. Make sure to mix well for a consistent mix.
Applying Epoxy for Panel Joints
With the epoxy ready, apply it to the plywood panel edges. Before joining, wet out the plywood surfaces with epoxy. This helps the epoxy stick well, making a strong connection. Clamping and drying time are crucial for a lasting bond.
“Epoxy is the adhesive of choice for stitch and glue boat building, as it provides a strong, waterproof bond that is crucial for the boat’s durability and performance.”
By following the steps for mixing and applying epoxy to bond the plywood panels, you’re on your way to a sturdy, seaworthy boat.
How To Build a Stitch and Glue Boat at Home
Building a stitch and glue boat at home is a fun DIY project. You can make a custom watercraft using materials you can find easily and basic tools. This process includes cutting and putting together plywood panels, joining them with epoxy and fiberglass, and finishing the inside and outside.
The stitch and glue method is great for beginners because it’s easy and accessible. By following these steps, you can turn a few sheets of plywood into a sturdy boat. It’s perfect for having fun on the water.
- Cutting and Assembling the Plywood Panels: Start by measuring and cutting the plywood for the boat’s sides and bottom. Mark the shapes and cut them with a saw.
- Joining the Panels with Butt Blocks: Use epoxy to attach butt blocks to the plywood edges. This makes longer, smooth sections for the sides and bottom.
- Stitching and Gluing the Panels Together: Use wire or cable ties to stitch the panels together. Then, apply fiberglass tape and epoxy to the seams for extra strength.
- Installing Frames and Interior Components: Build the boat’s frames and add bulkheads, seats, and other features. This supports the structure and makes the ride comfortable.
- Fairing, Sanding, and Finishing: Sand the boat’s exterior to smooth it out. Then, apply a protective coating or paint to get the look you want.
By following these steps, you can make your own stitch and glue boat at home. The plywood boat building process lets you create a watercraft that’s just right for your next adventure.
| Key Steps in the Stitch and Glue Boat Building Process | Description |
|---|---|
| Cutting and Assembling Plywood Panels | Measure and cut the plywood to create the side and bottom panels for the boat’s hull. |
| Joining Panels with Butt Blocks | Use epoxy resin to attach butt blocks along the edges of the plywood panels, creating longer, seamless sections. |
| Stitching and Gluing Panels Together | Stitch the panels together using wire or cable ties, then apply fiberglass tape and epoxy resin to the seams. |
| Installing Frames and Interior Components | Construct the boat’s internal frames and install any necessary bulkheads, seats, or other interior features. |
| Fairing, Sanding, and Finishing | Smooth out the boat’s exterior by carefully sanding and fairing the hull, then apply a protective coating or paint. |
By using this DIY boat construction method, you can make a custom stitch and glue boat. The plywood boat building steps guide you through the whole project, from beginning to end.
Hull Assembly: Stitching and Gluing
The hull assembly for a stitch and glue boat is key. It involves stitching plywood panels together. Then, they are glued with epoxy resin and fiberglass for strength and water protection.
Stitching the Panels Together
The first step is stitching. This uses copper wire or cable ties to hold panels in place. Holes are drilled, and the stitches are tightened to shape the panels correctly.
Applying Fiberglass Tape and Epoxy
After stitching, fiberglass tape and epoxy are applied to the seams. This makes the hull strong and waterproof. The tape spreads stress, and the epoxy creates a solid bond. Once cured, the stitches are removed, leaving a smooth hull.
“The stitching and gluing process is the foundation of a stitch and glue boat’s hull, ensuring a strong, watertight structure that can withstand the rigors of the open water.”
Frames, Fiberglass, and Interior Construction
After the hull is built, the next step is to add the internal frames and finish the fiberglass work. These frames, made from fiberglass-reinforced epoxy, are key for the boat’s structure.
The frames are placed between the side panels and glued in place. This makes the boat strong. More fiberglass layers are added inside for extra strength.
Building the interior means making parts like seat tops and rubrail. These steps make the boat strong and safe for the water.
| Component | Purpose |
|---|---|
| Frames | Provide structural support for the hull |
| Fiberglass Reinforcement | Enhance strength and rigidity of the boat |
| Interior Elements | Construct functional components like seats and rubrail |
These steps make sure the boat is sturdy and well-made. By focusing on boat framing, fiberglass reinforcement, and interior boat building, DIY builders can make a boat that lasts.

“The true secret of happiness lies in taking a genuine interest in all the details of daily life.”
– William Morris
Fairing, Sanding, and Finishing
Building a stitch and glue boat ends with fairing the hull, sanding, and adding the final touches. Boat hull fairing smooths out bumps and imperfections with epoxy fillers and sanding tools. This makes the boat sleek and improves its performance.
Hull Fairing and Sanding
After fairing, the hull needs thorough sanding for painting or varnishing. This step is key for a top-notch finish. Start with coarse sandpaper to remove imperfections, then move to finer grits for a smooth surface.
Painting and Finishing Touches
With the hull sanded, it’s time for the final touches like painting or varnishing. Use high-quality marine paints or varnishes in multiple coats. This protects the boat and makes it look great.
Attention to detail in fairing, sanding, and finishing is crucial. It turns your homemade boat into a masterpiece that impresses everyone on the water.
Conclusion – How To Build a Stitch and Glue Boat
Building a stitch and glue boat at home is a fun and rewarding DIY project. It’s great for both newbies and seasoned boatbuilders. With this guide, you now know how to make your own wooden boat using plywood, epoxy, and fiberglass.
The stitch and glue method has many benefits. It makes a stronger hull, builds faster, and needs less special tools. With patience and a focus on details, you can make a top-notch boat for years of fun on the water.
This wraps up our detailed guide on building a stitch and glue boat at home. Whether you’re an experienced boatbuilder or new to DIY, this article gives you the tools to start your own project with confidence and excitement.
FAQ – How To Build a Stitch and Glue Boat
What is a stitch and glue boat?
A stitch and glue boat is made from plywood panels. These panels are held together with fiberglass tape and epoxy resin. This method is different from traditional boat building, which uses rigid molds.
What are the benefits of the stitch and glue construction method?
The stitch and glue method makes a boat’s hull strong and one-piece. It’s also easy to maintain. Plus, you can build it in your garage or workshop. It’s simpler and faster than other methods.
What tools and materials are needed to build a stitch and glue boat?
You’ll need a circular saw, jigsaw, drill, and epoxy brushes. Scissors and clamps are also important. The main materials are marine-grade plywood, epoxy resin, and fiberglass tape.
How do you cut and assemble the plywood panels for a stitch and glue boat?
First, mark the plywood sheets with the boat’s dimensions. For side panels, mark lines every 24 inches. Use these lines to plot the curved and straight lines. Cut the panels with a circular saw.
How are the plywood panels joined together using butt blocks?
Butt blocks are small plywood pieces glued to the seams. This extends the panels’ length. Prime the plywood with epoxy, align the panels, and apply epoxy to the butt block areas.
How is the epoxy resin prepared and applied to join the plywood panels?
Use marine-grade epoxy for the adhesive. Mix the resin and hardener as instructed. Apply the epoxy to the edges for a strong bond. Wet the plywood surfaces with epoxy before joining.
What is the process for stitching and gluing the boat’s hull?
First, stitch the panels together with copper wire or cable ties. Then, apply fiberglass tape along the seams and coat with epoxy. This creates a waterproof bond. Remove the stitches for a seamless hull.
How are the boat’s internal frames and reinforcement added?
Frames are made from fiberglass-reinforced epoxy. They support the hull. Place the frames between the panels and epoxy them in. Add more fiberglass layers inside for strength.
What are the final steps in finishing a stitch and glue boat?
Fair the hull, sand, and apply marine paints or varnishes. Fairing smooths out the hull using epoxy fillers and sanders. This ensures a sleek shape.
