
Starting a DIY boat project is rewarding but needs careful attention. Measuring and cutting wood right is key. But, what techniques and tools do you need for a perfect fit in your boat’s frame and hull?
In this guide, we’ll explore wood measurement and cutting. You’ll learn the skills to confidently work on your DIY boat. We’ll cover everything from the importance of precision to using the right tools. This will help you build a strong and beautiful boat.
Key Takeaways
- Accurate measurement and cutting are crucial for successful DIY boat building.
- The “Measure twice, cut once” adage is essential, as multiple measurements are recommended before cutting.
- Templates should be used to ensure proper fit, with one-half of the template mirroring the other side once the centerline is established.
- Some trimming after cutting may still be necessary to achieve a perfect fit.
- Proper tool selection and techniques are vital for clean and straight cuts in wood.
Understanding the Basics of Boat Building
Building a boat from scratch is a rewarding DIY project. It needs a good grasp of the basics. Precision in measurements is key. From picking the right lumber to cutting it accurately, each step requires careful attention.
Let’s explore the essential tools for your DIY boatbuilding plans.
Importance of Precision in Measurements
When building a boat, precision is crucial. Small measurement errors can cause big problems later. Accurate measurements ensure all parts fit perfectly, making a strong and safe boat.
It’s important to pay close attention to dimensions, whether using plywood or lumber.
Essential Tools for the Job
- Tape measure: A tape measure at least as long as the boat is recommended for long measurements.
- Folding rule: A wooden folding rule is useful for medium-length measurements.
- Combination square: This versatile tool can serve as a square, ruler, level, and marking gauge.
- Back saw: A back saw with a spine provides a thinner, more precise cut compared to backless saws.
- Hand planes: A block plane is great for precision shaping, while a rabbet block plane is ideal for lapstrake boat building.
- Sharpening tools: Diamond stones, honing guides, and a bench grinder with an adjustable tool rest help keep your tools razor-sharp.
- Cordless drill: A cordless drill with sharp wood drill bits is essential for creating pilot holes for fasteners.
- Clamps: Various clamps, such as push rods, spring clamps, and wheel-mounted clamps, are invaluable for securing and aligning components.
With the right tools and a focus on safety, you’ll be on your way to a beautiful DIY boat.
Types of Wood Used in Boat Building
Choosing the right wood is key when building a DIY boat. Marine plywood and exterior-grade plywood are top picks for small boats. High-quality 5-ply 1/4″ exterior plywood is a cost-effective choice, offering stability and water resistance. Douglas fir lumber is also popular for its strength and availability.
Common Choices for DIY Boats
- Marine plywood: Made for boat building, it’s water-resistant and durable.
- Exterior-grade plywood: Not as specialized, but still a good, cheaper option for small boats.
- Douglas fir lumber: Known for its strength and light weight, great for frames and ribs.
Pros and Cons of Each Type
| Wood Type | Pros | Cons |
|---|---|---|
| Marine Plywood | Superior water resistance Excellent dimensional stability Highly durable | Higher cost compared to exterior-grade plywood |
| Exterior-Grade Plywood | Cost-effective option Good water resistance Readily available | May not be as dimensionally stable as marine plywood |
| Douglas Fir Lumber | Excellent strength-to-weight ratio Durable and versatile Widely available | May require additional waterproofing treatment |
The wood you choose for your DIY boat depends on your budget, project complexity, and desired durability. Understanding the pros and cons of each boat construction materials helps make a well-informed choice.
“The art of making a boat from wood has been perfected over centuries, peaking in the 19th century.” – Christopher Columbus
For marine plywood grades, look for B.S. 1088 standard options. These ensure better water resistance and quality. Using epoxy wood sealants adds extra protection against moisture and the elements.
Preparing Your Workspace for Woodworking
Building your own DIY boat needs a safe and organized workspace. Getting your woodworking area ready can make the project more fun and efficient. Let’s look at how to set up your workspace right.
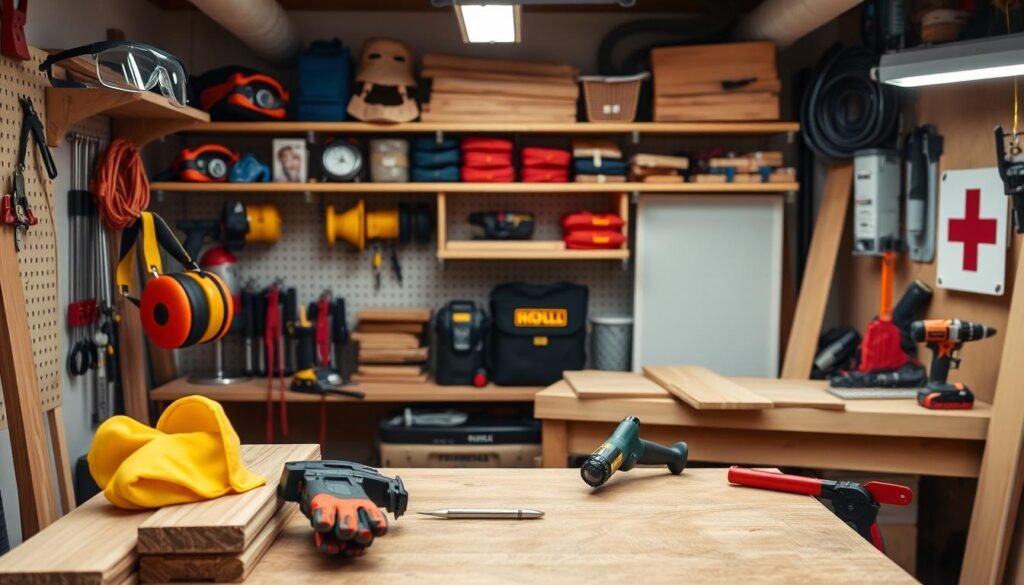
Safety Precautions in the Workshop
Woodworking, especially for boat building, is all about safety. Always wear a respirator when sanding to keep your lungs safe from dust. Make sure your workspace has good air flow, especially when using chemicals.
Keep your area clean and clutter-free to avoid accidents. Wear the right gear like goggles, gloves, and ear protection. This will help keep you safe while you work.
Organizing Your Tools and Materials
Being organized is key to a successful DIY boat project. Keep your tools within reach, sorted by what you need to do next. Store materials like wood and fasteners in labeled bins or shelves.
This way, you’ll save time and avoid getting frustrated. By focusing on safety and organization, you’re on your way to building your dream DIY boat. With the right woodworking safety practices and a good plan, your project will be rewarding and successful.
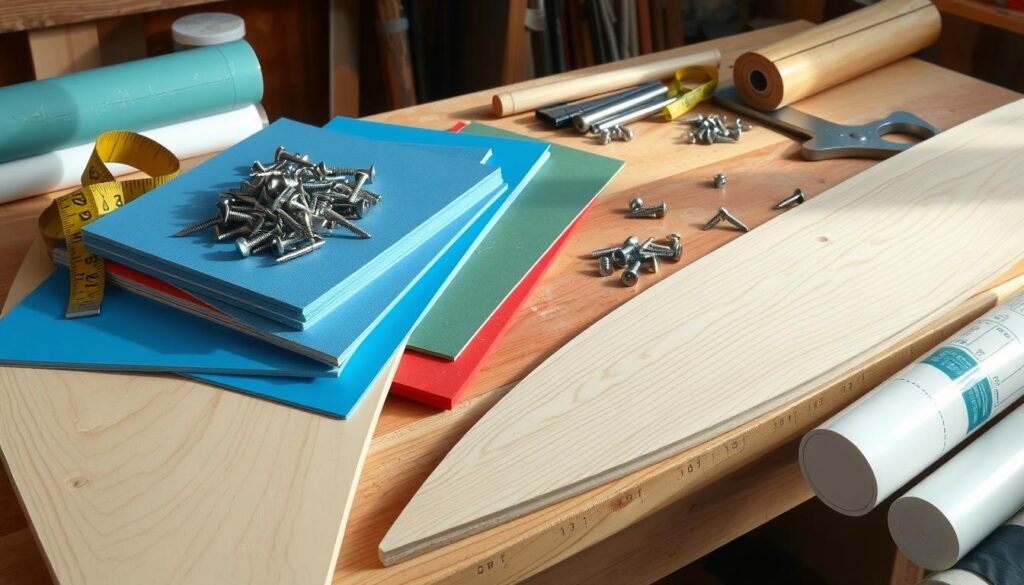
Key Measurements to Take Before Cutting
DIY boatbuilding needs precision. Before cutting wood, it’s vital to know the plans well. Lofting, or transferring measurements, is a key step.
Understanding the Plans and Blueprints
Lofting plots points on plywood from the plans. It’s like drawing a shape with dots. Use brad nails for marks and a flexible batten for curves. Always double-check your measurements before cutting.
Important Dimensions for Boat Parts
- Thickness of plywood: 1/4 inch
- Width of fiberglass tape for butt joining: 4 inches
- Width of fiberglass tape for seam taping: 4 inches
- Length of wire for stitching the boat: 6-8 inches
- Recommended glue: Structural epoxy or polyurethane
Good measuring tools, like a flexible tape and squares, are essential. They help in accurate wood measurement for DIY boats. Double-checking your work can prevent costly errors.
“Measurements should be taken at least twice before cutting pieces. Accounting for the thickness of materials when measuring and cutting is crucial to ensure proper alignment of joints.”
Understanding plans, lofting, and precise measurements will help you cut wood for your DIY boat with confidence.
Techniques for Accurate Measurements
Building a boat requires precision. The right measurement techniques are key. Use measuring tapes, squares, or marking tools with care for accurate cuts.
Using Measuring Tape and Squares
A good measuring tape is essential. Choose one with both imperial and metric units. This makes switching between systems easy. Use squares to check your angles are right.
Marking Techniques for Precision
- Mark wood with a sharp pencil or fine-tipped marker.
- For curves, a flexible batten helps make smooth lines.
- Shopbots can improve your precision when lofting plans.
Always check your measurements before cutting. This avoids mistakes. Using precision tools and accurate methods is crucial for a successful boat project.
| Tool | Purpose | Recommended Features |
|---|---|---|
| Measuring Tape | Measuring lengths and distances | Dual imperial and metric scales, sturdy construction |
| Squares | Ensuring right angles and straight lines | Variety of sizes, high-quality materials |
| Flexible Batten | Marking curved lines | Smooth, flexible material, easy to bend and hold in place |
| Shopbot | Precision cutting and lofting | Computer-controlled accuracy, ability to handle complex shapes |
“Accurate measurements are the foundation of any well-crafted boat. Take the time to double-check your work, and you’ll be rewarded with a finished product that stands the test of time.”
Cutting Tools: Choosing the Right One
Building your DIY boat needs the right cutting tools for precise woodcutting. Your DIY boatbuilding plans will come to life with the right tools. From saws to power planers, the right tools make a big difference in quality and accuracy.
Overview of Saws for Wood Cutting
You’ll need a saber saw, a hand power planer, and maybe a table saw for your boat project. Each tool has its own purpose, based on the cut you need.
- Saber saws are great for detailed cuts and tight spaces, making them versatile for boat building.
- Table saws are best for straight cuts on big wood pieces, giving clean, accurate results.
- Hand power planers help smooth and finish wood surfaces, giving a professional look.
Features to Look for in Cutting Tools
When picking cutting tools, look at their features and what they can do. Choose tools that are sharp, well-kept, and right for your tasks.
| Tool | Key Features |
|---|---|
| Bosch Jig Saws | Cuts steel up to 5/16th thick and wood up to 2 ¾ inches Corded version is more powerful for fast, rough cuts Cordless version is lighter, perfect for quick cuts Both cut 3/8th inch mild steel or 1/8th inch stainless steel Cordless model has a circle cutting function Need specialized Bosch T-shank blades Bosch blades last well, with metal blades lasting less than wood ones |
Investing in top-notch precision woodcutting tools is key for your DIY boatbuilding plans. While tools vary in price, remember that cheap tools might not save money in the long run. Quality tools, new or used, ensure clean cuts and a pro finish for your boat.
Step-by-Step Guide to Cutting Wood
Building a DIY boat needs precision, especially when cutting wood. A step-by-step approach ensures clean, straight cuts. This makes your boat sturdy and well-fitting. Let’s look at how to set up the wood and cut it accurately.
Setting Up the Wood for Cutting
Before cutting, prepare the wood well. First, check the boat plans to know the dimensions and layout. Use a nesting drawing to arrange parts on plywood sheets (48×96 inches or 122 by 244 cm) efficiently.
Leave a small space, about 1/4 inch, around each part for fitting. Trace the outlines on the plywood sheets. This will guide your cuts.
Executing Clean and Straight Cuts
Now, set up the wood and mark the cutting lines. Use the right wood measurement techniques and precision woodcutting tools for clean cuts. Cut just outside the marked lines.
For parts like side panels and frames, use a jigsaw or circular saw for initial cuts. Then, smooth the edges with a power plane or belt sander. When making the boat’s stem, cut out the shape, make identical pieces, and glue them together. Use a power plane to create the rolling bevel, then smooth with a belt sander.
By following these steps, you’ll get precisely cut components. This is key for a successful DIY boat project.
| Recommended Tools | Purpose |
|---|---|
| Jigsaw | Making initial cuts on plywood sheets |
| Circular Saw | Cutting larger panels and frames |
| Power Plane | Smoothing and trimming edges to precise lines |
| Belt Sander | Finishing and polishing cut edges |
Common Mistakes to Avoid When Measuring
Starting a DIY boatbuilding project is thrilling. But, it’s key to watch out for common mistakes. Accurate wood measurement and cutting are critical. Ignoring these steps can lead to expensive errors and delays.
Misjudging Lengths and Angles
It’s simple to get the dimensions wrong for your boat’s parts. This can cause parts not to fit right, structural problems, and safety risks. Always double-check your measurements and alignments before cutting the wood. Make sure frames are centered, square, level, and vertical to prevent boat twist.
Skipping the Test Cuts
Not taking your time with cuts can end badly. Make test cuts on scrap material before cutting the actual boat parts. This lets you refine your skills, check the fit, and spot any problems before making the final cuts. Spending time on precise wood measurement saves a lot of effort later.
For a successful DIY boat project, focus on the details, especially in measuring and cutting wood. By avoiding these mistakes, you’ll have a smoother and more fulfilling boatbuilding journey.
Finishing the Edges After Cutting
When building a DIY boat, finishing touches after cutting are key. Proper edge treatment boosts looks and guards against water damage. Let’s look at the steps for a smooth, lasting finish.
Sanding Techniques for a Smooth Finish
After cutting the wood, use a power sander to smooth the edges. Be careful not to damage the boat structure while sanding. Always wear a respirator to avoid inhaling wood dust.
Sealing Cut Edges Against Water Damage
Sealing cut edges is vital to protect your boat from water. Mix resin with microballoons or wood flour for a filler. Apply fiberglass tape to seams, avoiding air bubbles. Finish with a resin coat for moisture protection.
| Boat Construction Material | Recommended Sealant |
|---|---|
| Epoxy wood sealants | Resin and microballoons or wood flour mixture |
| Other boat construction materials | Resin coating for water protection |
By following these steps, your DIY boat’s edges will be smooth, sealed, and ready for the next stage.
Assembling Your Boat: The Next Steps
After measuring and cutting the wood for your DIY boat, it’s time to start assembling. This stage is crucial for a secure and correct boat. We’ll look at the main steps to join the wood and check the boat’s structure.
Joining Wood Pieces Securely
To start, attach the boat panels to the frames, transom, and stem. Use clamps, wire nails, and glue for strong joints. The stitching process involves threading wire through holes to join panels, working from back to front.
Make sure panels don’t overlap and stay aligned. This is key for a solid boat.
Checking Alignment and Fit
As you build your DIY boat, check the alignment and fit often. This helps spot and fix issues early. Look at the joints for tightness and panels for alignment.
If you see gaps or misalignment, fix them right away. This keeps your boat strong and safe.
By following these steps and focusing on details, you’ll make a sturdy DIY boat. The success of your project depends on the care and precision in building.
“The key to a successful DIY boat project is paying attention to the small details during the assembly process. Take the time to ensure a secure and aligned structure, and you’ll be rewarded with a boat you can truly be proud of.”
With the right DIY boatbuilding plans and boat construction materials, you’re on your way to making your dream boat. Stay focused, precise, and enjoy making your own custom watercraft.
Maintenance Tips for Your DIY Boat
Keeping your homemade boat in good shape is key. Regular checks and quick fixes are vital. Also, getting your boat ready for different seasons can stop problems before they start.
Regular Inspections and Repairs
Look over your boat often for signs of wear or damage. Check the protective coatings and fix any worn spots. This stops water from getting in and harming the wood.
For boats stored away, remember the wood can dry out and shrink. When you put it back in the water, give the wood time to swell and seal the seams again.
Preparing for Seasonal Changes
Using epoxy wood sealants can make your boat last longer and need less upkeep. These coatings add a protective layer against the weather. Keeping current with boat design software also helps spot areas that need attention during seasonal changes.
FAQ
Why is precision in measurement crucial for DIY boat building?
Accurate measurement and cutting are key in DIY boat building. Remember, “Measure twice, cut once” is a must. Take multiple measurements before cutting. This ensures the boat’s parts fit perfectly.
What are the common materials used in DIY boat building?
Materials for DIY boats include fiberglass, wood, steel, or aluminum. Wood boats often use marine or exterior grade plywood. You’ll need plywood sheets, lumber, nails, fiberglass cloth, resin, and wire for stitching.
What are the most common wood choices for DIY boats?
Marine and exterior grade plywood are top choices for DIY boats. High-quality 5-ply 1/4″ exterior plywood is cost-effective. Douglas fir lumber is also popular. The wood you choose affects the boat’s cost and durability.
How important is a well-organized workspace for boat building?
A tidy workspace is vital for safe and efficient boat building. Keep essential tools within reach. Always wear a respirator when sanding and ensure good ventilation with resins. Organizing materials helps avoid accidents and makes the process smoother.
What is the lofting process in boat building?
Lofting is a critical step in boat building. It involves transferring measurements from plans to materials. It’s like a game of connect-the-dots, plotting points on plywood. Always double-check measurements before cutting.
What tools are essential for cutting wood in boat building?
Key cutting tools include a saber saw, hand power planer, and sometimes a table saw. The right tool depends on the cut needed. A saber saw is best for detailed cuts, while a table saw is good for straight cuts on large pieces.
What are some common mistakes to avoid when measuring and cutting wood for boat building?
Avoid rushing measurements and cuts, and always double-check alignments. Building twist into the boat can happen if side panels aren’t aligned properly. Test cuts on scrap material before cutting actual parts.
How important is the finishing process after cutting the wood?
After cutting, smooth and round edges with a power sander. Be careful not to damage the boat structure. Use a resin and microballoons or wood flour mix to seal gaps. Apply fiberglass tape to seams to prevent air bubbles.
What are the key steps in assembling the boat after cutting the wood?
Start by attaching panels to frames, transom, and stem. Use clamps, wire nails, and epoxy or polyurethane glue for strong joints. Stitch panels together with wire, working from back to front and adjusting tension as needed.
How should wooden boats be maintained to ensure longevity?
Regular maintenance is key for wooden boats. Check for wear, damage, or water ingress and touch up where needed. For boats stored out of water, be aware of wood shrinkage. Allow time for the boat to swell and close seams when returned to water.
